I have been playing instead of doing the dreaded housey type stuff, I recently bought some new stamps by Justrite. They are older ones but were in the sale and try as I did I had to have them so gave in gracefully and bought Greetings from Paris, Bon Voyage and a background which is called Elegant Fronds.
This piece started off with me stamping the background stamp with Versamark and dusting it with Pan Pastels in Ultramarine blue Tint and Hansa Yellow Shade, I then stamped the Eiffel Tower onto the corner and an edge down the other side. I used the same ink pad (Adirondack Slate) to stamp the other images and again used the same Pans. I then went on the hunt for a backing paper and found this one in a HOTP pad.
Once I had laid out the items I decided to cut out the fence which is from a Memory Box die, once I'd laid that down I needed leaves so these are a Tattered Lace ivy die.
The butterfly is a free stamp from Craft Stamper which I've had for ages and the flowers have been sat in a box for a few years, I bought loads and stored them in a box which had disappeared so when I found it again they had to come out to play. I finished the whole thing of with some pearls but now I'm not too sure of the placement but it's tough as they are well and truly stuck.
I'm entering this into the following challenges;
Welcome to my blogland friends
Saturday, 10 May 2014
Sunday, 27 April 2014
CD Sunday - For Someone Special
Good morning all, another Sunday and my last day off work so must make the most of it. Over at CD Sunday this week Beryl has chosen the theme of for Someone Special, now most people we make cards for are special but for me this time it's for my brother and there isn't anybody more special than your family.
I recently bought the four day deal from C&C which was folders and a cd from Sheena but I also bought the stamps that went with it, well I've been playing and this card is one I've made with the folders, stamps and of course the cd. I wanted to use the tiger so stamped him out, I used a distress ink the first time but couldn't get it right so stamped it in black archival and just used the distress ink to colour him, I used rusty hinge and frayed burlap and found that I was quite happy with the look so didn't have to use another colour.
The background is the folder done with Kraft card but it was a bit dull even when I'd gone over to highlight the image so I used a pale wash of Silkies just to give the effect of a bit of light coming from the doorway. The backing paper is from the cd and I used the leaves embossing folder to give it extra texture, I cut out some leaves from the paper and used a gold embossing powder on them but I didn't want them solid so tried to make it look distressed which I think works. I then stamped the edger a couple of times but didn't match it 100% so used the symbol which looks like a 30 (I do hope my brother doesn't think I've lost the plot it's quite a while since he was 30).
When I stamped the sentiment I I heat embossed in the same gold, not sure why it happens but now and again I get a bit of scorching when I heat from underneath so instead of redoing it I just used some antique linen distress ink to hide it.
So there we have it, I'm quite pleased with it and I hope that it is well received.
I'm entering this into the following challenges
Simply Create Too - Layer it Up
Wags 'n Whiskers - Lots of Layers
Jellypark Challenges - One for the Boys
I recently bought the four day deal from C&C which was folders and a cd from Sheena but I also bought the stamps that went with it, well I've been playing and this card is one I've made with the folders, stamps and of course the cd. I wanted to use the tiger so stamped him out, I used a distress ink the first time but couldn't get it right so stamped it in black archival and just used the distress ink to colour him, I used rusty hinge and frayed burlap and found that I was quite happy with the look so didn't have to use another colour.
The background is the folder done with Kraft card but it was a bit dull even when I'd gone over to highlight the image so I used a pale wash of Silkies just to give the effect of a bit of light coming from the doorway. The backing paper is from the cd and I used the leaves embossing folder to give it extra texture, I cut out some leaves from the paper and used a gold embossing powder on them but I didn't want them solid so tried to make it look distressed which I think works. I then stamped the edger a couple of times but didn't match it 100% so used the symbol which looks like a 30 (I do hope my brother doesn't think I've lost the plot it's quite a while since he was 30).
When I stamped the sentiment I I heat embossed in the same gold, not sure why it happens but now and again I get a bit of scorching when I heat from underneath so instead of redoing it I just used some antique linen distress ink to hide it.
So there we have it, I'm quite pleased with it and I hope that it is well received.
I'm entering this into the following challenges
Simply Create Too - Layer it Up
Wags 'n Whiskers - Lots of Layers
Jellypark Challenges - One for the Boys
Saturday, 26 April 2014
Something new for me
This is what I've been playing with today instead of doing housework, well no contest really is there? I bought a couple of canvas boards and didn't have a clue what to do with them so basically I have played with paint, ink, stamps, stencils, texture paste and Treasure Gold. I don't know what to make of it but as I've never made anything like this before it's not a bad start do you think?
Wednesday, 23 April 2014
Butterfly tag
Well it shows I'm on holiday from work as I have been busy playing and when I saw that there is a new challenge over at Tag it On I decided to use some of the things on my desk that I was busy with last night.
The theme this week is a flower and the letter B, so no messing about here I have painted the tag with some watered down Silkies, you wouldn't believe I used three different colours on the background and none of them were blue! The stamped flower is one from some of the newest stamps from Sheena that arrived yesterday and the cut out flowers are from the embossing folder. The small flower in the backgound is stamped with Versamark and then dusted with mica powders, they look gold but the colour I used was mustard green. I painted some cream card with more Silkies and whilst it was still damp brushed some more mica this time it's called Passion. I cut two butterflies out and popped one on top of the other to give it a bit of dimension and finished off with some gems. Just for good measure I added a button just because I liked it.
I'm also adding this into the Butterfly Challenge which I spotted on The Crafty Robin's blog earlier and thought it would fit.
Clarity Stencil card
I made this on Monday/Tuesday, on Monday I used the stencil with three colours of pink in Distress ink, they are Spun Sugar, Tattered Rose and Worn Lipstick for the stems I used a Promarker in Marsh Green. Once I had coloured the design how I wanted it I then used some clear Sparkle Medium over the top and had to put it to one side to dry, you can't believe how hard I find that so I just left it overnight. The two layers underneath are coloured with the Worn Lipstick ink and the Marsh Green Promarker, it's not very often that I leave such a large amount of white but I think this works, I decided to pull some of the lipstick colour onto the top of the design but that was mostly because I had some ink on my finger and left a huge fingerprint and had to cover it! I was given some stamps for my birthday last year and I like the style of this wording so decided to give it an outing again I used the same pink distress ink.
I had just put this together when up popped a post from one of my crafty friends and she had used the same stencil but in different colours, it's here if you want to have a look.
Monday, 21 April 2014
Steampunk tag
I felt like I cheated a bit using stencils as my S in the last tag I did so I have done another and this time it's Steampunk, I have used some Chocolate Baroque stamps that I've had ages and yes they were another must have but you know all about that I guess. I have also used some of their Texture Fragments in the background, this time I have used Pan Pastels and stamped with Versamark. The window stamp is also stamped in Versamark but then I used a mica powder over it to intensify the blue.
I've never been a tag maker but recently have been using some I got in a box I bought when I went to Kanban so that shows you how long I've had them and I am enjoying playing with them. So this is another one for the Dragons Dream Tag it On challenge of Blue and 'S'
Sunday, 20 April 2014
Blue Tag
Over at the Dragons Dream Tag it On challenge blog they want blue and 'S' so I've had a little play with some JOFY stamps that I just had to have but have only used a couple of times.
The backgound is done with some blue Silkies mixed with some gloss gel medium and just brushed on, I am not very successful with Silkies normally but won't be defeated so have tried different ways to use them. Once I'd done the base layer I used a couple of stencils with Distress inks in Broken china and Shabby Shutters, I then stamped the images with Versafine in Onyx black and painted with more Silkies. I then used a blue Distress Stickles and put it over the little round bits on the stems.
I'm not sure if stencils will count as the S in the challenge but hopefully the girls will make allowances.
I'm also entering this into the Fashionable Stamping challenge, Flying Things.
Sunday, 13 April 2014
Something Old, Something New at CD Sunday
Hi there, can't believe it's Sunday again I think someone is stealing my days as they are going so fast it's almost a blur!
This week at CD Sunday we want you to go with the theme of something old, something new. Now that could be a wedding card but really what we were thinking was you should use something old and something new. For my card I've used a new cd from Crafter's Companion called Love & Romance and Special Birthdays resource cd, this cd is filled with images from the papercrafting kit they did of the same name but it's so handy to have it in a printable format as I usually wouldn't use everything that comes in the kits.
This card is a 7x10 but because it's a wedding card I think the larger size works well, I printed the whole set from one of the images and that way there's no guess work to see if the colours match. I used the plainer of the designs as a mat, I'm not sure how I managed it but changed the settings on the printer and got the main backing paper to print out at the right size for the card, that way I didn't lose any of the design around the edge.
Before I stuck the the two sheets together I cut the tattered lace dies from the pink paper and I did forget to turn the paper over so the curves were the same way around but I quite like the look it has so ok in the end. I used Centura Pearl card as the mats for the topper and sentiment and raised them up with some foam tape. I tied a knot in the spiders web and glued it onto the card and then I used my old element which is the pins, my friend bought them for me about 18 months ago and I forgot I had them so when I found them again I knew what I would be using some of them for.
I hope you can join us and we'll call on you to say hello and comment on your design.
I am also entering this into the following challenges;
Tuesday, 8 April 2014
Shabby Chic Wall Hanging
I really wanted to play with the printable canvas but not for printing on so this is what I've come up with. I used a coarse texture paste through a stencil then once that had dried I added Pan Pastels, originally it was just the pale colours but thought it needed a bit more oomph so added the Violet Shade, I wanted the areas that had the pattern on to stand out a bit more so used the gold pan but not really sure which one and it looks totally different on here to what it does in the pack. I used a few die cuts to add embellishments and apart from the crown all were cut from Centura Pearl, covered with distress ink and then dusted over with some metallic pans. I have added ribbon to make something to hang it by and have put some beads and butterflies on too.
On the back I have added another piece of canvas with the Irish Blessing,
May there always be work for your hands to do
May your purse always hold a coin or two;
May the sun always shine on your windowpane;
May a rainbow be certain to follow each rain;
May the hand of a friend always be near you;
May God fill your heart with gladness to cheer you.
There are several about but this one was perfect for the person who is getting this.
I'm entering this into the Pan Pastel challenge which this week is Pretty Shabby Chic, now I'm not sure this fits the bill but I'll give it a go.
On the back I have added another piece of canvas with the Irish Blessing,
May there always be work for your hands to do
May your purse always hold a coin or two;
May the sun always shine on your windowpane;
May a rainbow be certain to follow each rain;
May the hand of a friend always be near you;
May God fill your heart with gladness to cheer you.
There are several about but this one was perfect for the person who is getting this.
I'm entering this into the Pan Pastel challenge which this week is Pretty Shabby Chic, now I'm not sure this fits the bill but I'll give it a go.
Sunday, 30 March 2014
CD Sunday this week is a sketch
Good morning and Happy mothers Day to you all whether you are a mum or not. This week at CD Sunday there is a sketch to follow and I decided to use one of my new cd's from Crafter's Companion.
The sketch is a very easy one to follow and for this card I printed onto gloss photo paper, I must admit that I prefer the matte paper but this does make a change. I hope you can come over and join in with us.
Sunday, 16 March 2014
Mother, Mum, Mummy
Hello all, I've been neglecting my blog again but it's not because I haven't been doing anything just that I have a couple of projects on the go and they're not finished yet.
This week at CD Sunday Sue B has chosen Mother, Mum, Mummy as her theme, well I only realised yesterday that it was this week and I hadn't done anything so this card is a quicky. I used Craft Artist and a digi kit I bought while they had a sale on French Country, it's full of very pretty things and is really easy to work with. I also used a frame from the Lace Market digi kit which comes in black but I recoloured it with one of the colours from the kit.
I was rushing to gt it done and when I was using my Perfect Layers rulers to get a nice even edge around the topper I managed to slip and ended up with no mat down half of one side so I had to trim it all off and start again but I got there in the end and all I needed was a few gems and a ribbon. I have taken everything off apart from the lace frame and the teapot and cups, reduced the opacity on the background, added a verse and the inside is now finished.
I hope you can come and join us and even f you don't have amum to make a card for you can still use something that shows a mum even if it is an animal.
This week at CD Sunday Sue B has chosen Mother, Mum, Mummy as her theme, well I only realised yesterday that it was this week and I hadn't done anything so this card is a quicky. I used Craft Artist and a digi kit I bought while they had a sale on French Country, it's full of very pretty things and is really easy to work with. I also used a frame from the Lace Market digi kit which comes in black but I recoloured it with one of the colours from the kit.
I was rushing to gt it done and when I was using my Perfect Layers rulers to get a nice even edge around the topper I managed to slip and ended up with no mat down half of one side so I had to trim it all off and start again but I got there in the end and all I needed was a few gems and a ribbon. I have taken everything off apart from the lace frame and the teapot and cups, reduced the opacity on the background, added a verse and the inside is now finished.
I hope you can come and join us and even f you don't have amum to make a card for you can still use something that shows a mum even if it is an animal.
Monday, 3 March 2014
Mothers day card
Hello again, today I'm sharing my mum's Mother's Day card. I have used an image from the Gruffies and Happy hoppers cd from Joanna Sheen, I got it out to do my challenge card for CD Sunday and then just had to print some more out and make something else.
I recently found a challenge blog called Gruffies and guests so this card is being entered into their current challenge which is Fit for Mum or Special female. I have used my favourite embossing folder and I think I need to hide it and move on to something else but I do think it's pretty special and perfect for lots of cards. The flowers were coloured with my Copic pens but they wouldn't colour the pearls so I had to use a Spectrum Noir to get them the right colour. I have also used some spiders web in white to cover the patterned card which has given it a bit of texture and interest. Hope you like!
Saturday, 1 March 2014
Easter Parade at CD Sunday
Happy Sunday peeps, it's time for another CD Sunday challenge and this week it's the turn of our newest team member Wynn to choose her topic and she has chosen Easter Parade.
I don't make a lot of Easter cards but there is always someone who appreciates getting one in the post so this is my card.
This is from the Joanna Sheen cd, The Gruffies and Happy Hoppers, I have a box of shaped cards and to be honest some of the shapes aren't the best but this is ok and because of the cost of posting I've made this fairly simple and plain. I have glued the backing paper onto the card and added some ribbon around, I have used a small round die cut to give it a bit of interest under the topper, this is one I bought from Oyster Stamps in the sale, it was a bargain and I did get some others at the same time one of which was a bird cage. i had always wanted a cage but thought I may not get enough use out of it but when I saw the sale prices I couldn't resist. Anyway back to the card to give it a bit of a lift I added some glue around the edge and then put glitter onto it, I have made a couple of bits a bit thicker than the rest but it shows more in the picture than it does on the card.
I hope you'll join us and support Wynn's first time choosing the theme, we love to come over and visit you.
Wednesday, 26 February 2014
Kanban lady
After digging out my Kanban stamps, I decided to use the other lady to make a card, I wanted a totally different colour to the last one so had a rummage through my box and fond this patterned card which I bough a while ago on one of my many trips to Kanban when they were in Shipley.
I put the card through one of my favourite embossing folders which I think is called Tumbling Hearts and I also think it's a Sue Wilson design but I could have got that totally wrong! I cut the flowers out of the same card and put some Ruby Treasure Gold over them, I also put the Treasure gold around the edge of the card and on the corner die at the top. The image is coloured with Graph'it pens and Spectrum Noir pencils, I managed to get two sets of the pencils but now need the other sets to complete the set.
Sunday, 23 February 2014
A vision in turquoise
I don't have a CD Sunday card for you this week so I have a bit of a play with my markers and stamps.
This card looks fairly simple but it has taken a while to get it to the stage it is now, the background card was cream and black and it's one of the Kanban range. I coloured it with my Graph'it pens, I also coloured the spiders web, the die cuts and the sentiment oh yes and of course the image itself.
The cagelike embellishment was silver but I put it into some black alcohol ink in the hope that it would change it and it worked, I'm quite pleased with it.
I wanted to use the die to cut the image out but if I had just put it straight down I would have cut her hand off so I cut around her hand and put the die under it, the lack layer underneath the image is hand cut, I just drew around the outside of the die to give me the right size border.
I've got inky fingers but have enjoyed making something that looks very simple but was fun to do.
This card looks fairly simple but it has taken a while to get it to the stage it is now, the background card was cream and black and it's one of the Kanban range. I coloured it with my Graph'it pens, I also coloured the spiders web, the die cuts and the sentiment oh yes and of course the image itself.
The cagelike embellishment was silver but I put it into some black alcohol ink in the hope that it would change it and it worked, I'm quite pleased with it.
I wanted to use the die to cut the image out but if I had just put it straight down I would have cut her hand off so I cut around her hand and put the die under it, the lack layer underneath the image is hand cut, I just drew around the outside of the die to give me the right size border.
I've got inky fingers but have enjoyed making something that looks very simple but was fun to do.
Sunday, 16 February 2014
All About Spring at CD Sunday
Hi there, I'm back with my card for this weeks challenge over at CD Sunday where Beryl has chosen All About Spring for us.
I really enjoyed doing this weeks card because I have done something a little different, my main image is a stamp from Chocolate Baroque, I coloured the paper with Distress Ink and then stamped the image, I then went over to give it some definition with ProMarkers, I took a photo of the image and took it into Craft Artist where I used a kit called A Whisper of Spring, the kit is mostly green and white but I needed something to match the stamped image so picked the colours from the background to change the paper and embellishments to tie it all together.
I do hope you like it and will come over and join us.
Sunday, 9 February 2014
Love Always at CD Sunday
Hello everyone, I'm having a week off from posting the challenge over at CD Sunday. Since we decided to have two teams I now only have to post the challenge every other week and Carol has stepped up and taken on the other teams postings so not only do I get a week off I get to join in just like everyone else.
This week I was asked by one of the guys in work if I would make him a valentine card for his wife, well I have been wondering what to do as I don't really know if she is someone who likes cute or is more traditional so I have combined the two. I used Craft Artist and Docrafts Digital designer to make this card, the background is from a digi kit called Lace Market, there are a few embelishments that are all ready to go and all I did was drag the square panel onto the page, resize it and colour it the same as the backing, I then added a shadow so you could see it and it was done. I do like the effect as it does look a little like it's an extra piece on top. The bear is from the digital designer, I exported him and dropped him into CAP, I took him into the cut out studio and removed all the white around him and just resized him to fit in the centre of the card, I then printed out two more bears and cut out the layers for decoupage, the words are in the same colour grey as the bear as I used the dropper to pick up the colour.
I coloured some white ribbon to match and tied a double bow then added a heart shaped gem to finish it off, I put a dab of glue on every rose and added some red glitter, for the inside I used the same lace panel and coloured it white added a shadow and put a small bear in the bottom corner found a verse on the internet and I just hope he likes it now! Mind you if he doesn't I could have just made my own valentine card.
This week I was asked by one of the guys in work if I would make him a valentine card for his wife, well I have been wondering what to do as I don't really know if she is someone who likes cute or is more traditional so I have combined the two. I used Craft Artist and Docrafts Digital designer to make this card, the background is from a digi kit called Lace Market, there are a few embelishments that are all ready to go and all I did was drag the square panel onto the page, resize it and colour it the same as the backing, I then added a shadow so you could see it and it was done. I do like the effect as it does look a little like it's an extra piece on top. The bear is from the digital designer, I exported him and dropped him into CAP, I took him into the cut out studio and removed all the white around him and just resized him to fit in the centre of the card, I then printed out two more bears and cut out the layers for decoupage, the words are in the same colour grey as the bear as I used the dropper to pick up the colour.
I coloured some white ribbon to match and tied a double bow then added a heart shaped gem to finish it off, I put a dab of glue on every rose and added some red glitter, for the inside I used the same lace panel and coloured it white added a shadow and put a small bear in the bottom corner found a verse on the internet and I just hope he likes it now! Mind you if he doesn't I could have just made my own valentine card.
Sunday, 2 February 2014
Ribbons and Bows at CD Sunday
Good morning all, it's time for another challenge at CD Sunday and this week it's my turn to choose the theme. For my sins I chose Ribbons and Bows, I had forgotten how hard it is to use ribbons on our cards and had to force myself with this one.
My card this week is made with backing papers from the Cupcake cd, Walk on the Wild Side. I have used some stamps I bought while at the Great British Craft Festival last year, I have to admit they were an impulse buy and I haven't really used them a lot but I do like the set and the quirkiness of them.
This card is an A4 sheet folded to make a card 7.5 x 8.5, I printed out the backing papers from the cd and then embossed the plain one. I used a piece large enough to almost fill the smaller side and then cut strip to add to the other side. The paper under the girl with the hat on is from a Bo Bunny sheet which just seemed to fit with the design. The two girls are coloured with pencils and my original thought was the ribbons in the hair and on the hat would form the ribbons and bows element of the theme but then I used a punch to cut the slots in the large plain piece so threaded some ribbon through, not sure it's the right colour so it may end up being changed.
I hope you can come and join us and have a bit of fun with this challenge. x
I am entering this into Crafty Hazelnuts Patterned Paper challenge which this week is anything goes.
Sunday, 19 January 2014
Here Kitty Kitty at CD Sunday
Hello! I've been MIA for a couple of weeks and am getting withdrawal symptoms, but I'm hoping to make more time to play and will be updating my blog more frequently. This week it's the turn of my team over at CD Sunday and Sue has chosen the theme of Here Kitty Kitty, well I stamped an image from a stamp that I have had for years and although I love the stamp I can never get the kind of result that I'm happy with when I colour the cat and it's not the kind of stamp that you can just leave as black and white so it was back to the drawing board and find something else to use. I usually find that the Joanna Sheen cd's are such a useful source of images that I almost went down that route then I remembered that I had the Flowers in Bloom cd from Card Creations Plus and I was sure I'd seen a cat on there that I liked so I had a look. Sure enough there it was and I decided to go with that, I decided to change the colour a little and yes I know that Agapanthus are blue I went with green just to be different, the good thing about this cd is if you change the colour of the image then the backing papers change too so I didn't have to remember what settings I had used.
I found a sheet of black embossed paper that I used as a backdrop and then printed a sheet of backing paper from the cd, I cut the topper and two pieces of backing paper with the same die and layered them up slightly off set. I then cut some die cut leaves and a bow and popped them in the corners, finally I decided to cut a couple of small butterflies which I added to the flowers and I'm done.
I hope you can come over and join us, we do love to see the things you come up with and as usual there will be a small prize for the winner of the top three.
Sunday, 5 January 2014
Pretty in Pink at CD Sunday
Good morning to you it's Sunday again so that means a new challenge over at CD Sunday, we have a brand new look and we have split the teams into two so I hope you can pop over and give us your support. We also have a new team member, Wynn from Sunshine Cards and Crafts has joined from this month.
The first challenge of the year has a topic chosen by Christine which is Pretty in Pink, I recently bought a few new cd's from C&C while they were in the sale and one of them was Mabel Lucy Attwell 2 from Katy Sue Designs, I'm not sure how much I will use it but as it was only just over £6 I thought it was worth taking a chance.
I covered the card with the backing paper and then mounted the topper which was sprayed with Spray and Sparkle onto black mirror card and attached it to the card using 3d foam. The bow is made from a little left over backing paper and I used my Envelope punch board to do it, I saw a tutorial on You tube so I won't be needing templates any more as they are so easy.
The first challenge of the year has a topic chosen by Christine which is Pretty in Pink, I recently bought a few new cd's from C&C while they were in the sale and one of them was Mabel Lucy Attwell 2 from Katy Sue Designs, I'm not sure how much I will use it but as it was only just over £6 I thought it was worth taking a chance.
I covered the card with the backing paper and then mounted the topper which was sprayed with Spray and Sparkle onto black mirror card and attached it to the card using 3d foam. The bow is made from a little left over backing paper and I used my Envelope punch board to do it, I saw a tutorial on You tube so I won't be needing templates any more as they are so easy.
Subscribe to:
Posts (Atom)
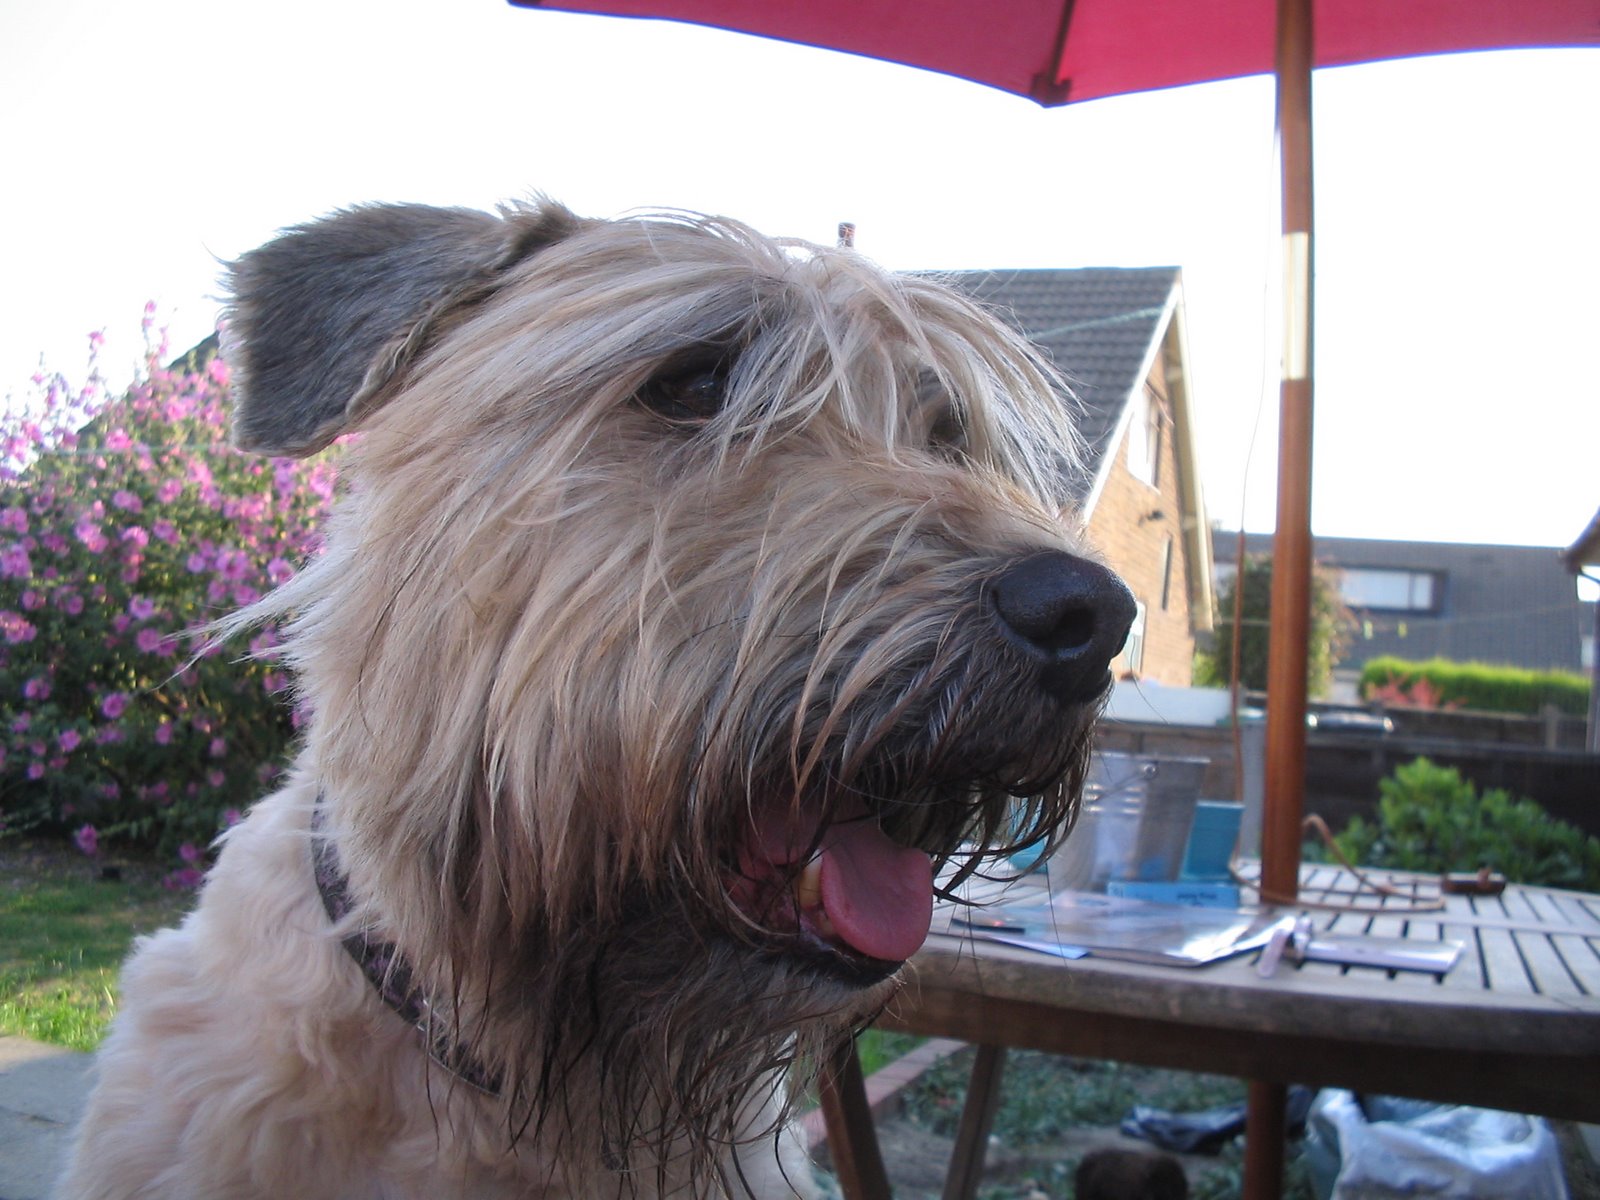
Pooka
My favourite picture of Pooka
Blog Archive
-
▼
2014
(70)
- ► 12/14 - 12/21 (1)
- ► 12/07 - 12/14 (1)
- ► 11/30 - 12/07 (1)
- ► 11/23 - 11/30 (1)
- ► 11/16 - 11/23 (3)
- ► 11/02 - 11/09 (1)
- ► 10/26 - 11/02 (1)
- ► 10/19 - 10/26 (4)
- ► 10/05 - 10/12 (2)
- ► 09/28 - 10/05 (1)
- ► 09/21 - 09/28 (2)
- ► 09/14 - 09/21 (5)
- ► 08/31 - 09/07 (1)
- ► 08/24 - 08/31 (2)
- ► 08/17 - 08/24 (2)
- ► 08/10 - 08/17 (2)
- ► 07/27 - 08/03 (2)
- ► 07/13 - 07/20 (2)
- ► 07/06 - 07/13 (1)
- ► 06/29 - 07/06 (2)
- ► 06/22 - 06/29 (1)
- ► 06/15 - 06/22 (1)
- ► 06/08 - 06/15 (1)
- ► 06/01 - 06/08 (2)
- ► 05/25 - 06/01 (5)
- ► 05/18 - 05/25 (1)
- ► 05/11 - 05/18 (1)
- ► 05/04 - 05/11 (1)
- ► 04/27 - 05/04 (1)
- ► 04/20 - 04/27 (5)
- ► 04/13 - 04/20 (1)
- ► 04/06 - 04/13 (1)
- ► 03/30 - 04/06 (1)
- ► 03/16 - 03/23 (1)
- ► 03/02 - 03/09 (1)
- ► 02/23 - 03/02 (3)
- ► 02/16 - 02/23 (1)
- ► 02/09 - 02/16 (1)
- ► 02/02 - 02/09 (1)
- ► 01/19 - 01/26 (1)
- ► 01/05 - 01/12 (1)
-
►
2013
(68)
- ► 12/29 - 01/05 (2)
- ► 12/01 - 12/08 (2)
- ► 11/24 - 12/01 (1)
- ► 11/17 - 11/24 (1)
- ► 11/10 - 11/17 (1)
- ► 11/03 - 11/10 (3)
- ► 10/27 - 11/03 (2)
- ► 10/20 - 10/27 (2)
- ► 10/13 - 10/20 (2)
- ► 10/06 - 10/13 (1)
- ► 09/22 - 09/29 (1)
- ► 09/15 - 09/22 (1)
- ► 09/08 - 09/15 (1)
- ► 09/01 - 09/08 (4)
- ► 08/25 - 09/01 (1)
- ► 08/18 - 08/25 (1)
- ► 08/11 - 08/18 (1)
- ► 08/04 - 08/11 (1)
- ► 07/28 - 08/04 (2)
- ► 07/21 - 07/28 (1)
- ► 07/14 - 07/21 (1)
- ► 07/07 - 07/14 (3)
- ► 06/30 - 07/07 (1)
- ► 06/23 - 06/30 (1)
- ► 06/16 - 06/23 (2)
- ► 06/09 - 06/16 (2)
- ► 06/02 - 06/09 (2)
- ► 05/26 - 06/02 (3)
- ► 05/19 - 05/26 (2)
- ► 05/12 - 05/19 (1)
- ► 04/28 - 05/05 (1)
- ► 04/21 - 04/28 (3)
- ► 04/07 - 04/14 (1)
- ► 03/31 - 04/07 (1)
- ► 03/24 - 03/31 (1)
- ► 03/17 - 03/24 (1)
- ► 03/10 - 03/17 (1)
- ► 03/03 - 03/10 (1)
- ► 02/24 - 03/03 (1)
- ► 02/17 - 02/24 (1)
- ► 02/10 - 02/17 (1)
- ► 02/03 - 02/10 (1)
- ► 01/27 - 02/03 (1)
- ► 01/20 - 01/27 (1)
- ► 01/13 - 01/20 (2)
- ► 01/06 - 01/13 (1)
-
►
2012
(97)
- ► 12/30 - 01/06 (3)
- ► 12/23 - 12/30 (1)
- ► 12/16 - 12/23 (1)
- ► 12/02 - 12/09 (1)
- ► 11/25 - 12/02 (1)
- ► 11/18 - 11/25 (1)
- ► 11/11 - 11/18 (1)
- ► 11/04 - 11/11 (1)
- ► 10/28 - 11/04 (1)
- ► 10/21 - 10/28 (3)
- ► 10/14 - 10/21 (1)
- ► 10/07 - 10/14 (2)
- ► 09/30 - 10/07 (2)
- ► 09/23 - 09/30 (1)
- ► 09/16 - 09/23 (3)
- ► 09/09 - 09/16 (6)
- ► 09/02 - 09/09 (2)
- ► 08/26 - 09/02 (2)
- ► 08/19 - 08/26 (2)
- ► 08/12 - 08/19 (1)
- ► 08/05 - 08/12 (3)
- ► 07/29 - 08/05 (1)
- ► 07/22 - 07/29 (1)
- ► 07/15 - 07/22 (2)
- ► 07/08 - 07/15 (1)
- ► 07/01 - 07/08 (1)
- ► 06/24 - 07/01 (1)
- ► 06/17 - 06/24 (1)
- ► 06/10 - 06/17 (3)
- ► 06/03 - 06/10 (2)
- ► 05/27 - 06/03 (3)
- ► 05/20 - 05/27 (1)
- ► 05/13 - 05/20 (3)
- ► 05/06 - 05/13 (2)
- ► 04/29 - 05/06 (2)
- ► 04/22 - 04/29 (2)
- ► 04/15 - 04/22 (2)
- ► 04/08 - 04/15 (2)
- ► 04/01 - 04/08 (3)
- ► 03/25 - 04/01 (2)
- ► 03/18 - 03/25 (2)
- ► 03/11 - 03/18 (1)
- ► 03/04 - 03/11 (3)
- ► 02/26 - 03/04 (1)
- ► 02/19 - 02/26 (2)
- ► 02/12 - 02/19 (2)
- ► 02/05 - 02/12 (2)
- ► 01/29 - 02/05 (2)
- ► 01/22 - 01/29 (2)
- ► 01/15 - 01/22 (1)
- ► 01/08 - 01/15 (3)
- ► 01/01 - 01/08 (2)
-
►
2011
(130)
- ► 12/25 - 01/01 (2)
- ► 12/18 - 12/25 (2)
- ► 12/11 - 12/18 (2)
- ► 12/04 - 12/11 (2)
- ► 11/27 - 12/04 (2)
- ► 11/20 - 11/27 (2)
- ► 11/13 - 11/20 (2)
- ► 11/06 - 11/13 (2)
- ► 10/30 - 11/06 (2)
- ► 10/23 - 10/30 (2)
- ► 10/16 - 10/23 (2)
- ► 10/09 - 10/16 (3)
- ► 10/02 - 10/09 (3)
- ► 09/25 - 10/02 (1)
- ► 09/18 - 09/25 (2)
- ► 09/11 - 09/18 (3)
- ► 09/04 - 09/11 (1)
- ► 08/28 - 09/04 (2)
- ► 08/21 - 08/28 (2)
- ► 08/14 - 08/21 (2)
- ► 08/07 - 08/14 (3)
- ► 07/31 - 08/07 (2)
- ► 07/24 - 07/31 (3)
- ► 07/17 - 07/24 (2)
- ► 07/10 - 07/17 (4)
- ► 07/03 - 07/10 (2)
- ► 06/26 - 07/03 (2)
- ► 06/19 - 06/26 (2)
- ► 06/12 - 06/19 (1)
- ► 06/05 - 06/12 (3)
- ► 05/29 - 06/05 (2)
- ► 05/22 - 05/29 (2)
- ► 05/15 - 05/22 (2)
- ► 05/08 - 05/15 (3)
- ► 05/01 - 05/08 (3)
- ► 04/24 - 05/01 (3)
- ► 04/17 - 04/24 (2)
- ► 04/10 - 04/17 (2)
- ► 04/03 - 04/10 (2)
- ► 03/27 - 04/03 (4)
- ► 03/20 - 03/27 (4)
- ► 03/13 - 03/20 (2)
- ► 03/06 - 03/13 (3)
- ► 02/27 - 03/06 (3)
- ► 02/20 - 02/27 (3)
- ► 02/13 - 02/20 (10)
- ► 02/06 - 02/13 (3)
- ► 01/30 - 02/06 (3)
- ► 01/23 - 01/30 (1)
- ► 01/16 - 01/23 (4)
- ► 01/09 - 01/16 (3)
- ► 01/02 - 01/09 (1)
-
►
2010
(126)
- ► 12/19 - 12/26 (2)
- ► 12/12 - 12/19 (1)
- ► 12/05 - 12/12 (1)
- ► 11/28 - 12/05 (2)
- ► 11/21 - 11/28 (3)
- ► 11/14 - 11/21 (1)
- ► 11/07 - 11/14 (3)
- ► 10/31 - 11/07 (3)
- ► 10/24 - 10/31 (2)
- ► 10/17 - 10/24 (2)
- ► 10/10 - 10/17 (3)
- ► 10/03 - 10/10 (1)
- ► 09/26 - 10/03 (1)
- ► 09/19 - 09/26 (2)
- ► 09/12 - 09/19 (2)
- ► 09/05 - 09/12 (2)
- ► 08/29 - 09/05 (2)
- ► 08/22 - 08/29 (3)
- ► 08/15 - 08/22 (2)
- ► 08/08 - 08/15 (3)
- ► 08/01 - 08/08 (3)
- ► 07/25 - 08/01 (2)
- ► 07/18 - 07/25 (4)
- ► 07/11 - 07/18 (6)
- ► 07/04 - 07/11 (3)
- ► 06/27 - 07/04 (3)
- ► 06/20 - 06/27 (1)
- ► 06/13 - 06/20 (1)
- ► 06/06 - 06/13 (3)
- ► 05/30 - 06/06 (2)
- ► 05/23 - 05/30 (3)
- ► 05/16 - 05/23 (3)
- ► 05/09 - 05/16 (2)
- ► 05/02 - 05/09 (4)
- ► 04/25 - 05/02 (4)
- ► 04/18 - 04/25 (5)
- ► 04/11 - 04/18 (4)
- ► 04/04 - 04/11 (2)
- ► 03/28 - 04/04 (2)
- ► 03/21 - 03/28 (1)
- ► 03/14 - 03/21 (3)
- ► 03/07 - 03/14 (2)
- ► 02/28 - 03/07 (4)
- ► 02/21 - 02/28 (1)
- ► 02/14 - 02/21 (2)
- ► 02/07 - 02/14 (2)
- ► 01/31 - 02/07 (1)
- ► 01/24 - 01/31 (5)
- ► 01/17 - 01/24 (4)
- ► 01/10 - 01/17 (3)
-
►
2009
(59)
- ► 12/27 - 01/03 (3)
- ► 12/20 - 12/27 (3)
- ► 12/13 - 12/20 (2)
- ► 12/06 - 12/13 (1)
- ► 11/22 - 11/29 (2)
- ► 11/15 - 11/22 (1)
- ► 11/08 - 11/15 (3)
- ► 11/01 - 11/08 (4)
- ► 10/11 - 10/18 (3)
- ► 10/04 - 10/11 (1)
- ► 09/20 - 09/27 (5)
- ► 09/13 - 09/20 (1)
- ► 08/30 - 09/06 (1)
- ► 07/19 - 07/26 (1)
- ► 06/28 - 07/05 (2)
- ► 06/21 - 06/28 (3)
- ► 06/14 - 06/21 (2)
- ► 05/31 - 06/07 (1)
- ► 05/24 - 05/31 (1)
- ► 04/19 - 04/26 (2)
- ► 04/12 - 04/19 (1)
- ► 03/22 - 03/29 (1)
- ► 03/08 - 03/15 (1)
- ► 02/01 - 02/08 (3)
- ► 01/25 - 02/01 (8)
- ► 01/18 - 01/25 (1)
- ► 01/11 - 01/18 (1)
- ► 01/04 - 01/11 (1)
-
►
2008
(39)
- ► 12/28 - 01/04 (2)
- ► 12/07 - 12/14 (2)
- ► 11/30 - 12/07 (1)
- ► 11/23 - 11/30 (1)
- ► 11/09 - 11/16 (1)
- ► 10/12 - 10/19 (2)
- ► 09/28 - 10/05 (1)
- ► 09/14 - 09/21 (1)
- ► 08/31 - 09/07 (1)
- ► 08/24 - 08/31 (1)
- ► 08/17 - 08/24 (1)
- ► 08/10 - 08/17 (2)
- ► 08/03 - 08/10 (2)
- ► 06/22 - 06/29 (1)
- ► 06/15 - 06/22 (2)
- ► 06/08 - 06/15 (1)
- ► 05/11 - 05/18 (3)
- ► 05/04 - 05/11 (1)
- ► 04/27 - 05/04 (3)
- ► 04/20 - 04/27 (4)
- ► 04/13 - 04/20 (4)
- ► 04/06 - 04/13 (1)
- ► 03/30 - 04/06 (1)